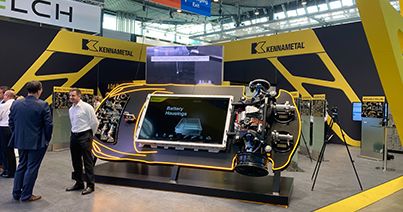
For US customers, a tariff surcharge will be added to your order for metal cutting products.

Tech Tip: A Hydraulic Chuck Quick Guide

Seven Kennametal Tool Holders

Hydraulic chucks are essential tools in precision machining, offering high accuracy and stability.

They provide consistent clamping force, excellent vibration damping, and ease of use. This guide explores the mechanics, advantages, and best practices for extending the tool life of hydraulic chucks.

How do Hydraulic Chucks Work?

Hydraulic chucks operate on the principle of hydraulic pressure. They consist of a cylindrical body with an internal chamber filled with hydraulic fluid. When the clamping screw is tightened, it compresses the hydraulic fluid, which in turn expands the chamber and applies uniform pressure around the shank of the cutting tool. This ensures a secure and precise grip.

Key Components

  • Clamping Bore: The internal cavity where the cutting tool is inserted.
  • Hydraulic Chamber: Filled with hydraulic fluid, this chamber expands to apply pressure.
  • Clamping Screw: Tightened to compress the hydraulic fluid and create the clamping force.
  • Stop Pin/Stop Screw: Ensures the tool is inserted to the correct depth.
  • Hex Wrench: Used for adjusting the tool length and tightening the clamping screw.
Kennametal HSK Hydraulic Chucks

Advantages of Hydraulic Chucks

  • Hydraulic chucks provide excellent runout accuracy, typically within 3 microns. This precision is crucial for high-speed machining and achieving fine surface finishes.
  • The hydraulic fluid acts as a damper, reducing vibrations during machining. This leads to better surface quality and longer tool life.
  • The clamping and unclamping process is easy and straightforward for the user, requiring only a hex wrench.
  • The hydraulic mechanism ensures that the clamping force provides uniform pressure around the tool shank, preventing tool slippage and ensuring consistent performance.
  • Suitable for a wide range of applications, from high-speed milling to drilling and reaming.

Step-by-Step Guide for Hydraulic Chuck Longevity

Step 1: Cleanliness is Key

Before using your hydraulic chuck, remove all grease from both the chuck and the cutting tools. This step is crucial to prevent slippage and ensure a secure grip.

Step 2: Insert the Cutting Tool

Carefully insert the cutting tool into the clamping bore. Push it in as far as the stop pin or stop screw will allow. This ensures the tool is properly seated and ready for adjustment.

Step 3: Adjust the Cutting Tool Length

Using a hex wrench, adjust the cutting tool length. Make sure the tool is positioned correctly for your specific machining needs.

Step 4: Tighten the Clamping Screw

Always hand-tighten the clamping screw with a hex wrench until you reach the stop limit. Never attempt to adjust the stop pin while the hydraulic chuck is in the clamping position, as this can damage the chuck and compromise safety.

Step 5: Accuracy and Shanks

For the best accuracy, use a round shank with h6 tolerance and no bushing. Weldon shanks can be gripped without reducer collets, up to a maximum diameter of ¾” (20 mm). However, it is recommended to use reducer collets for all flatted shanks to ensure a secure and precise grip.

By following these steps, you can maintain the integrity of your hydraulic chuck and cutting tools, ensuring precise and efficient machining operations.

Kennametal Hydraulic Chucks

Ready to take your machining to the next level? Start with these expert hydraulic chuck guidelines and take a look at some of our high-performance chucks including our HSK63A line.

You are about to add to your My Solutions page. Do you want to proceed?
Select the destination where you want to move to.
Select the project where you want to add product(s) to.
New Folder
    • Applied Filters:
    • Clear All

product-image
Please adjust the following properties from

ISO Catalog Number

ANSI Catalog Number

to find similar products.

The following files are available

Please select a file to download

Models

You should be logged to see your dashboard information
Session expired due to inactivity, please login again
The product/s () you were trying to add to the cart is/are not available, please contact customer service
item(s) successfully added to the cart
View Cart

. Please enter the desired qty for the material(s) you want to include in your promotion or Proceed Without Promotion and only your base materials will be added to the cart.

Minimum quantity should be

SAP Material Number ISO Catalog Number Grade  

You are about to leave the Solution building process.

Are you sure you want to leave?

Standard

ALL

Material

Select a Value

Hardness

--

Hardness Scale

--

Permitted Groups :

Group

SubGroup

Hardness (HB)

Hardness (HRC)